Building a Cat Tree Around a Tall, Slim Hamster Enclosure
The Genius Hack for Small Spaces & Curious Cats
Let's be real. Pet furniture is… clutter city. The cat tree in the corner, the hamster cage on the shelf—it's a whole obstacle course. What if I told you you could combine them? Actually, one could become the other. Building a cat tree around a tall, slim hamster cage isn't just a space-saver. It's a stroke of pure, unadulterated genius. You give your cat the high-rise condo they crave, and your hamster gets front-row seats to the weirdest, fluffiest TV show ever: Cat TV, live and in-person. All in one vertical footprint. It's a win-win-win. Let's talk about how.
Step 1: Finding the "Spine" of Your Operation

First, you need the right cage. This is non-negotiable. Forget those little plastic boxes. You're looking for a habitat that's tall, slim, and structurally solid. Think a "hexagon" or "column" style cage, or one of those sleek, tower-like acrylic ones. It needs to be sturdy enough to handle a cat occasionally leaning on it. Seriously. Check the weight rating. The cage is your central pillar, the spine of this whole beast. Once you've got that, you can start building the skeleton—the cat tree frame—around it. This is where the tall slim hamster cage integration magic starts.
Building the Frame: It's a Cage Hug, Not a Squeeze
Here’s the thing. You're not bolting wood to plastic. You're building a freestanding frame that *wraps* around the cage. Picture a square or triangular frame made of 2x2s or 4x4s. It should be a couple inches wider than the cage on all sides. This gap is your safety buffer. It prevents vibrations, gives you access to clean the cage, and stops the cat from using it as a scratching post. The key is stability. This frame needs to be rock-solid on its own. Think heavy-duty corner brackets, wood glue, and maybe even anchoring it to a wall stud. A wobbly tower is a disaster waiting to happen. For a cat and a hamster.
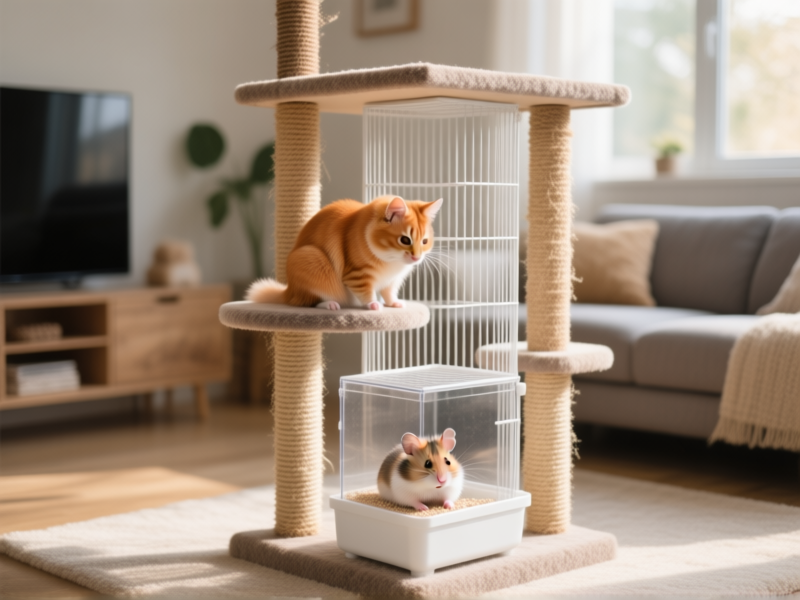
Platforms, Perches, and the Great View
This is the fun part. Attach your platforms and perches to the outer frame. Position at least one platform just above the cage's top—prime lounging territory. Another halfway down gives a mid-level surveillance point. Now, for the secret sauce: leave one side of the frame more open. Maybe just a single post. This creates a "viewing gallery" for your cat. They can sit, sprawl, and watch the tiny, fuzzy show inside the hamster enclosure without feeling boxed in. It satisfies their curiosity while keeping a safe, respectful distance. It turns the cage from an obstacle into the main attraction of their personal jungle gym.
The Finishing Touches (And Critical Safety Checks)
Wrap those posts in sisal rope. Add some comfy carpet to the platforms. Maybe dangle a toy from the top beam. But stop. Before you let your cat ascend their new throne, you have to run the checks. Is the frame 100% wobble-free? Are all screws and brackets tight and smooth? Can the hamster cage door open fully without hitting any wood? Most importantly, is the cage lid secure? I mean, *really* secure. We're talking clips, maybe even a small lock. Cats are clever. They see lids as puzzles. Your job is to make that puzzle impossible to solve. A narrow pet habitat combo only works if the "pet" part is utterly, completely safe for both species.
Why This Isn't Just a DIY Project, It's Smarter Pet Ownership
Look. You're not just gluing some wood together. You're solving two problems at once. You're creating vertical territory for a predator and a secure, engaging habitat for prey—in one elegant, space-saving column. It reduces floor clutter by about 70%. It provides endless enrichment. Your cat gets mental stimulation (bird watching is so last year). Your hamster gets a dynamic environment (those giant eyes appearing and disappearing is probably more exciting than a silent wheel). And you get a piece of functional furniture that actually looks intentional. Not like a pet store threw up in your living room. That's the real victory, isn't it?